The UVQ G14 manual IR control allows the user to switch infrared illumination on or off according to the actual lighting conditions.
This guide uses real photographs from the device to explain three points:
- How to confirm that the IR illuminator is active
- How to manually control IR through the UVQ G14 menu
- How the image changes between IR OFF and IR ON
The photographs were captured during a real indoor test. The IR setting was manually changed through the device menu so that the two operating states could be compared directly.
The UVQ G14 IR Illuminator Can Be Manually Controlled
The UVQ G14 does not require the IR illuminator to remain active all the time.
When some ambient light is available, the user can keep IR switched off and allow the device to use the existing light in the environment. When the scene becomes too dark, the user can manually activate IR to provide additional illumination.
This manual control gives the user two practical operating options:
- IR OFF: Use the available ambient light for passive low-light observation.
- IR ON: Add infrared illumination when the available light is insufficient.
The photograph below was taken while the IR illuminator was active. The camera captured a small red or pink light point at the front of the device, providing a simple visual confirmation that the emitter was operating.
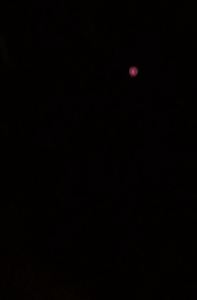
This photograph is used only to demonstrate the active operating state. The way the light point appears may vary according to the camera sensor and shooting conditions.
How to Control IR Through the UVQ G14 Menu
The IR illuminator is controlled through the UVQ G14 on-screen menu.
The basic control process is:
- Open the UVQ G14 settings menu.
- Navigate to the IR control option.
- Use the device controls to change the IR switch between OFF and ON.
- Confirm the switch position on the screen.
- Return to the live observation image and check the result.
The following two real menu photographs show the difference between the two switch positions.
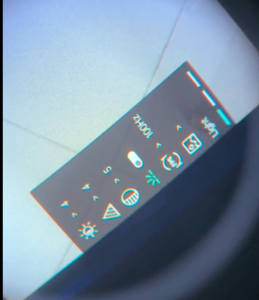
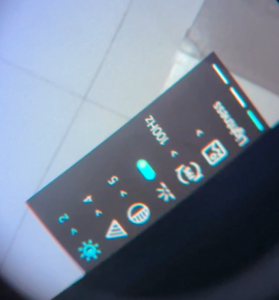
When the switch is in the OFF position, the front IR illuminator is disabled. The G14 continues to display the image using the available light detected by its sensor.
When the switch is moved to the ON position, the front IR illuminator becomes active and provides additional infrared illumination to the scene.
Because the control is manual, the user can decide whether IR is necessary instead of allowing it to operate continuously.
Real Imaging Comparison: IR OFF vs IR ON
The most direct way to understand the function is to compare images of the same subject with the IR illuminator switched off and on.
The two images below were recorded under the same general indoor conditions. They should be displayed together as one comparison rather than separated into different sections of the article.
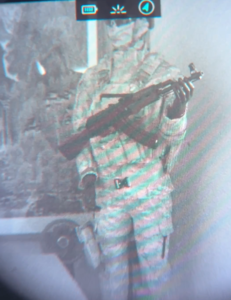
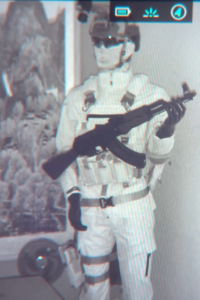
Image With IR Switched Off
With IR switched off, the UVQ G14 relies on the limited ambient light already present in the room.
The subject can still be observed, but some areas appear darker and the separation between the subject and the background is reduced.
This operating mode is suitable when the environment still contains enough available light to produce a usable image.
Image With IR Switched On
After IR is manually switched on, the subject receives additional infrared illumination.
In this test, the subject becomes brighter and easier to distinguish. Clothing, equipment outlines and differences between light and dark surfaces become more visible.
This comparison demonstrates the practical purpose of the IR control: it allows the user to add illumination only when the existing light is not sufficient.
Why Manual IR Control Is Useful
Manual control is useful because nighttime environments are not all the same.
Some locations may contain moonlight, street lighting, indoor light leakage or other weak light sources. In these conditions, the G14 may already provide a usable image without IR assistance.
Other locations may have very little usable light. In these situations, manually activating IR can improve the visibility of nearby subjects.
Manual control also allows the user to switch IR off when:
- The existing ambient light is already sufficient
- A nearby object appears too bright
- A reflective surface reduces visible detail
- The user wants to compare passive and IR-assisted imaging
The recommended operating method is simple: begin with IR switched off, observe the image, and activate IR only when additional illumination is required.
What the Three Groups of Real Images Demonstrate
Together, the photographs provide a complete explanation of the UVQ G14 manual IR function.
- The front-emitter photograph shows the operating state when IR is active.
- The two menu photographs show how the IR switch changes between OFF and ON.
- The two imaging photographs show the actual difference in the displayed image after IR is activated.
This is more useful than showing only a specification stating that the product includes an IR illuminator. Buyers can see that the function is manually controlled, identify the control position and examine the real imaging change.
Does the UVQ G14 Always Need IR?
No. The UVQ G14 can operate with IR switched off when sufficient ambient light is available.
The IR illuminator is an additional tool for darker environments. It does not replace the device’s passive low-light imaging capability.
The G14 uses a 1-inch BSI CMOS sensor for low-light digital imaging. Readers who want to understand the relationship between sensor size and light collection can read Why Sensor Size Matters in Digital Night Vision Devices.
Frequently Asked Questions
Is the UVQ G14 IR illuminator manually controlled?
Yes. The user can switch the IR illuminator on or off through the UVQ G14 menu.
Can the UVQ G14 work with IR switched off?
Yes. When ambient light is available, the G14 can use the existing light for low-light observation.
When should IR be switched on?
IR can be activated when the available ambient light is no longer sufficient to produce a clear and usable image.
How can the user confirm the IR setting?
The IR switch position can be checked directly in the on-screen menu. The user can then return to the observation image to evaluate the result.
Why should IR OFF and IR ON images be compared together?
A side-by-side comparison makes it easier to see how additional IR illumination changes image brightness, subject visibility and contrast under the same viewing conditions.
Conclusion
The UVQ G14 manual IR control gives the user direct control over infrared illumination.
The user can open the device menu, switch IR between OFF and ON, confirm the operating state and immediately observe the resulting image change.
The real photographs in this test demonstrate the complete process: the active front emitter, the manual menu control and the actual IR OFF versus IR ON imaging result.
For full product information, visit the UVQ G14 digital night vision monocular page.
Contact UVQ for product information, dealer cooperation, sample evaluation or OEM/ODM support.
 English
  Chinese
  Spanish